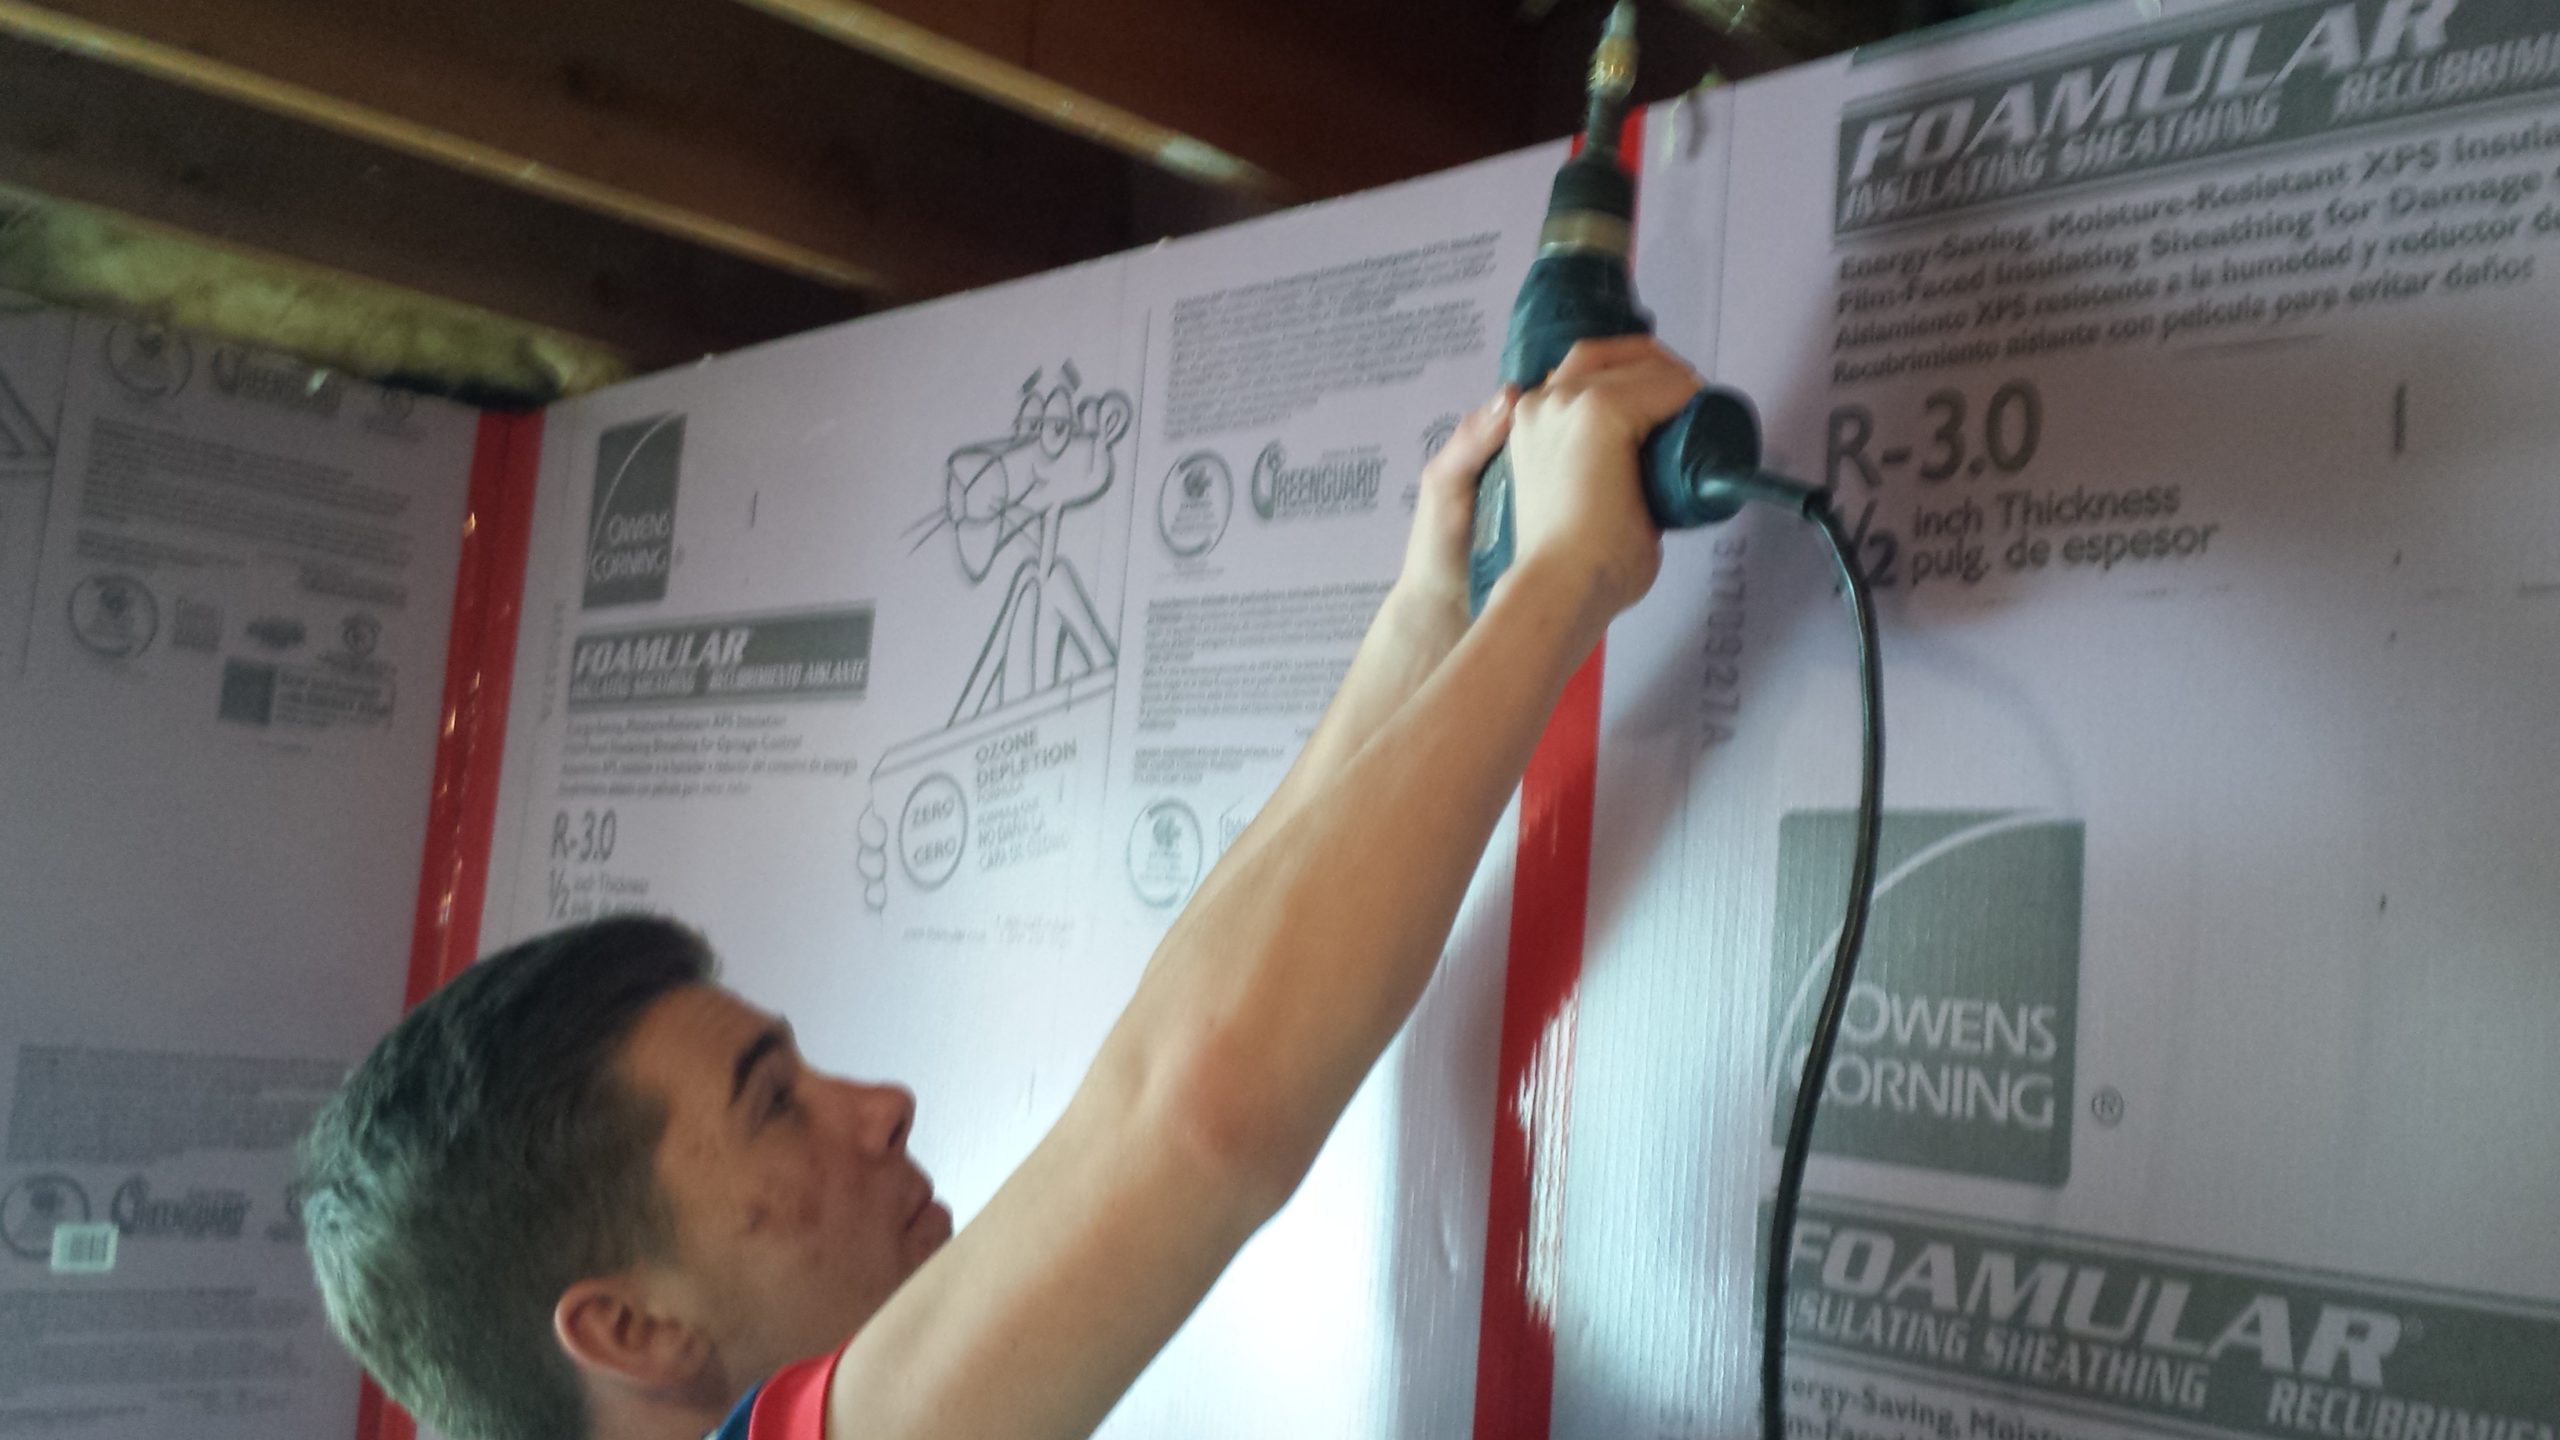
I calculate the required amount of foamboard insulation for the basement and start installing the first layer of paneling. The seams between each panel are sealed with insulation tape. Even though only one wall is done, the basement has less of an echo.
Month: March 2018
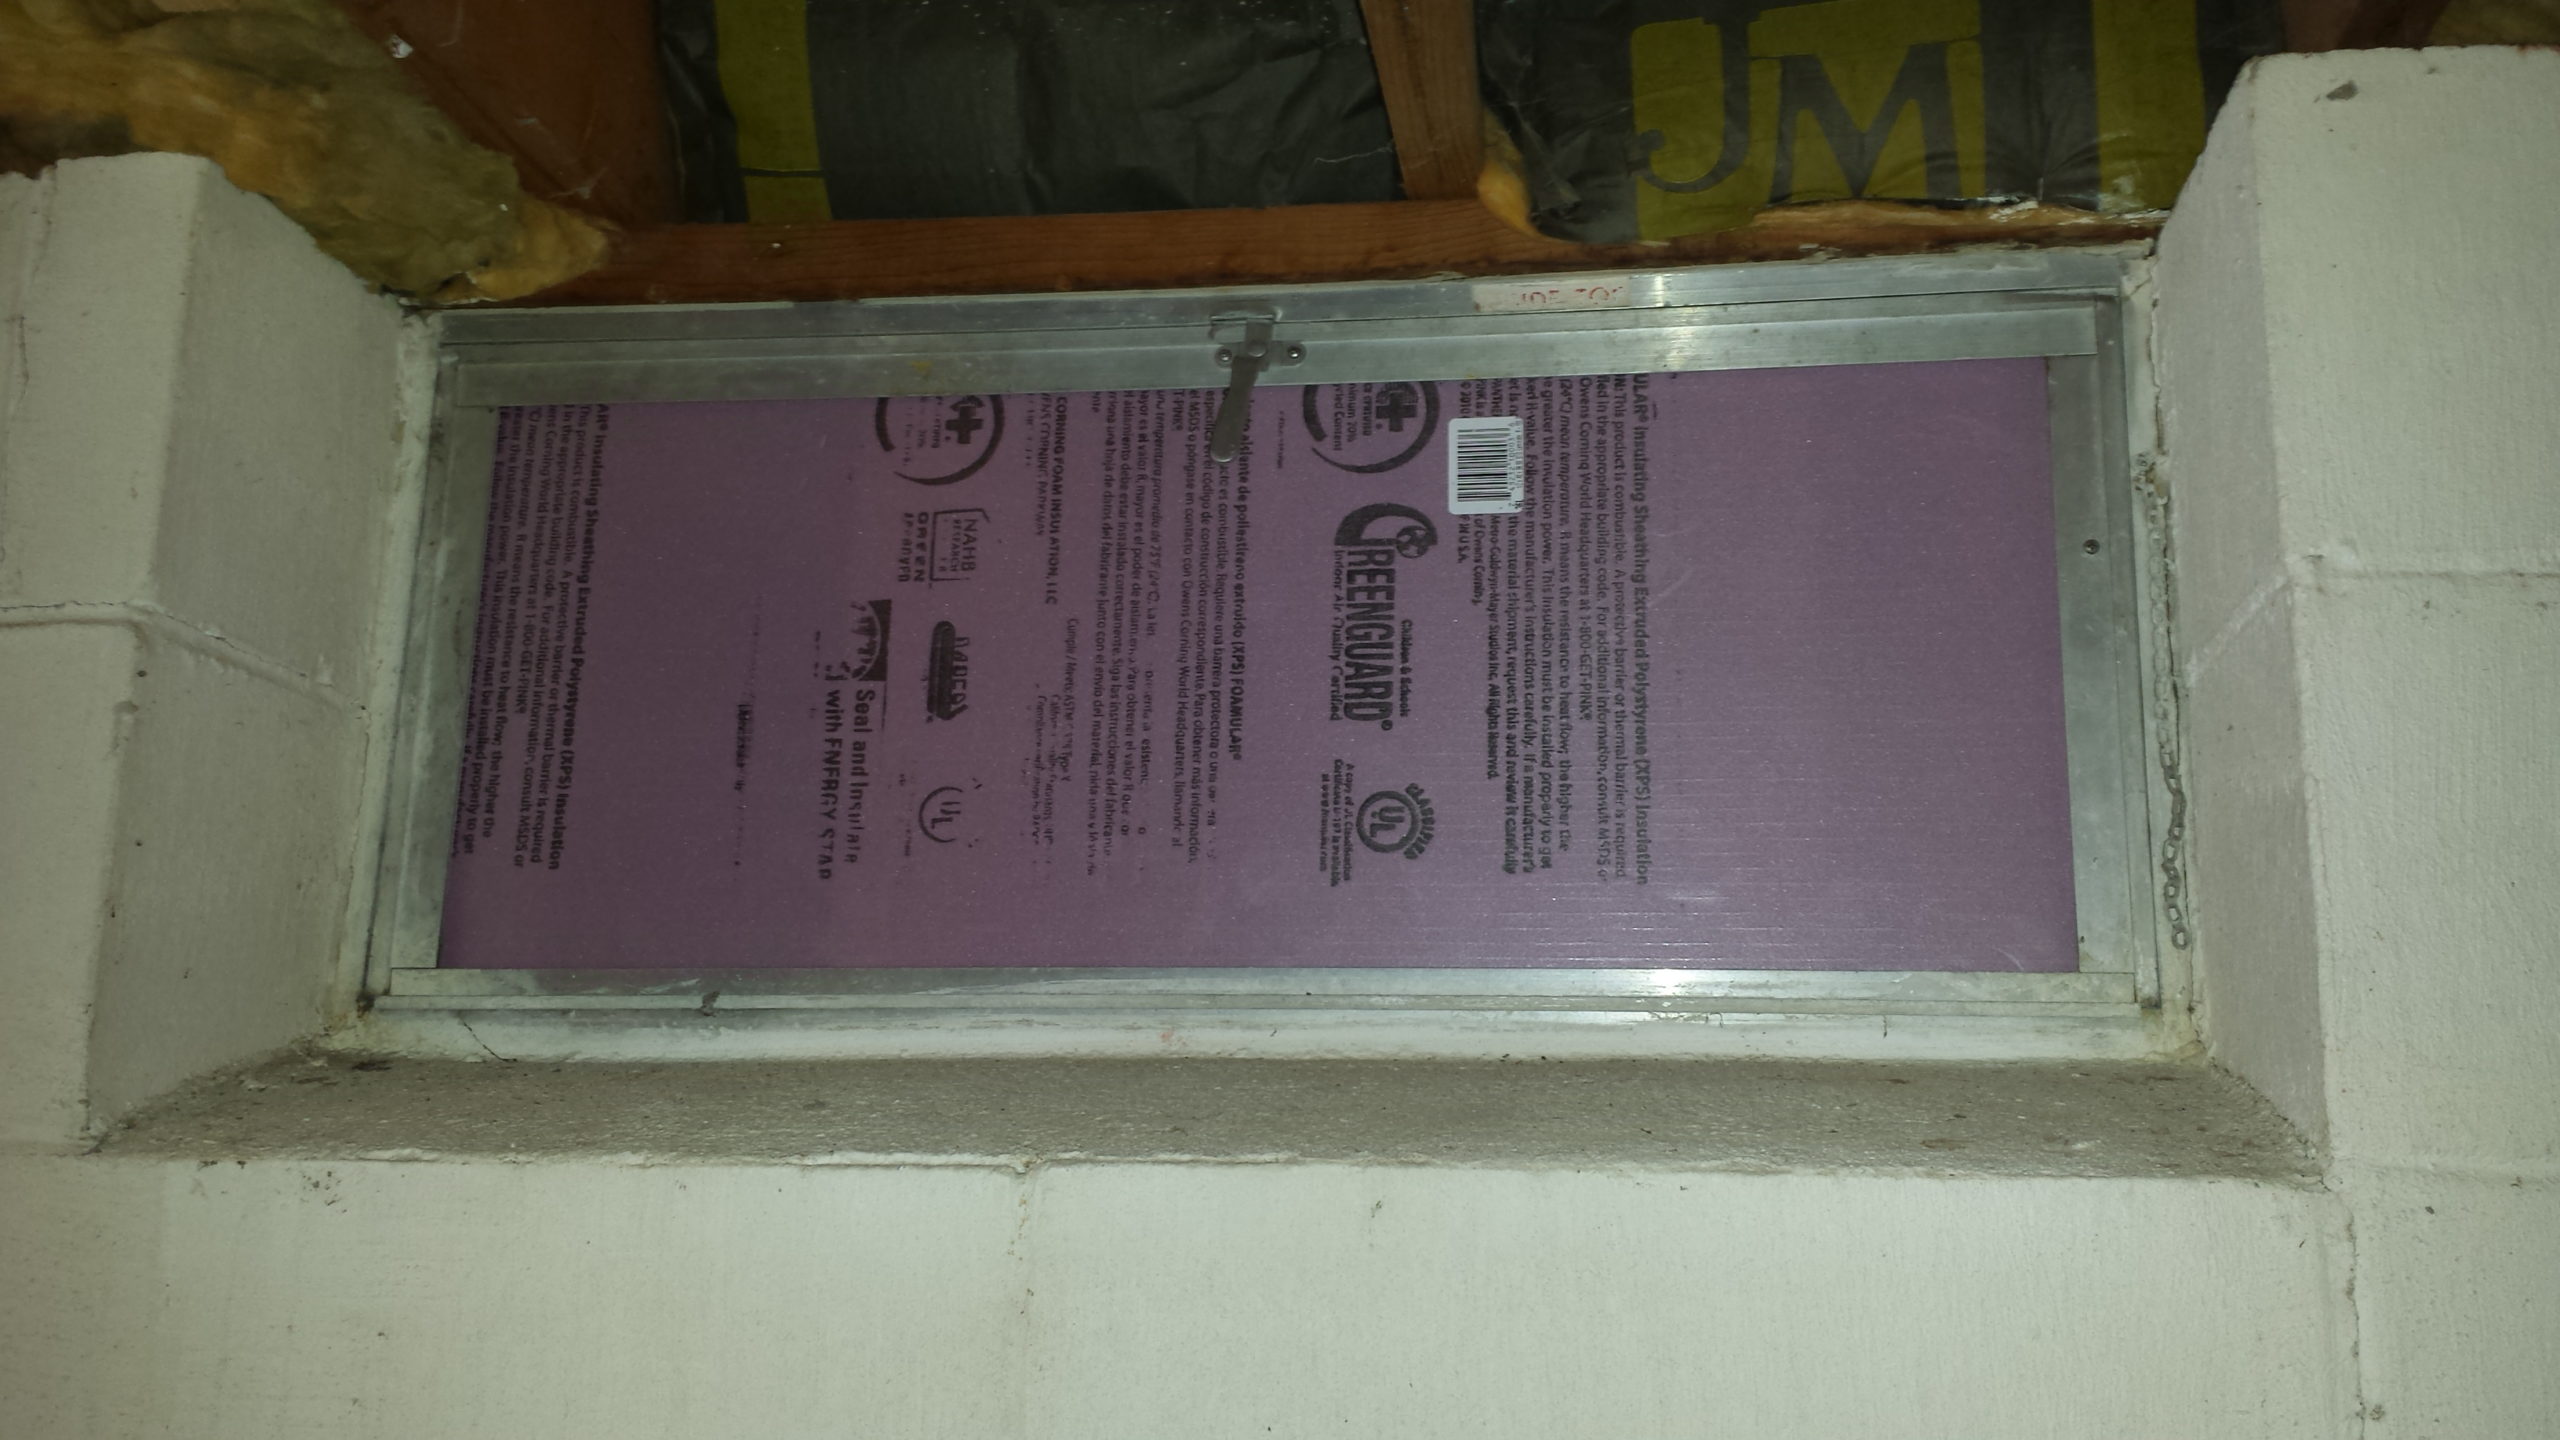
Remember that hidden window we found?
When we found that hidden window beneath the deck, we knew that it was going to stay orphaned. But the single pane glass is doing nothing for insulation. Today I opened up the window and insulated it with several layers of foamboard.
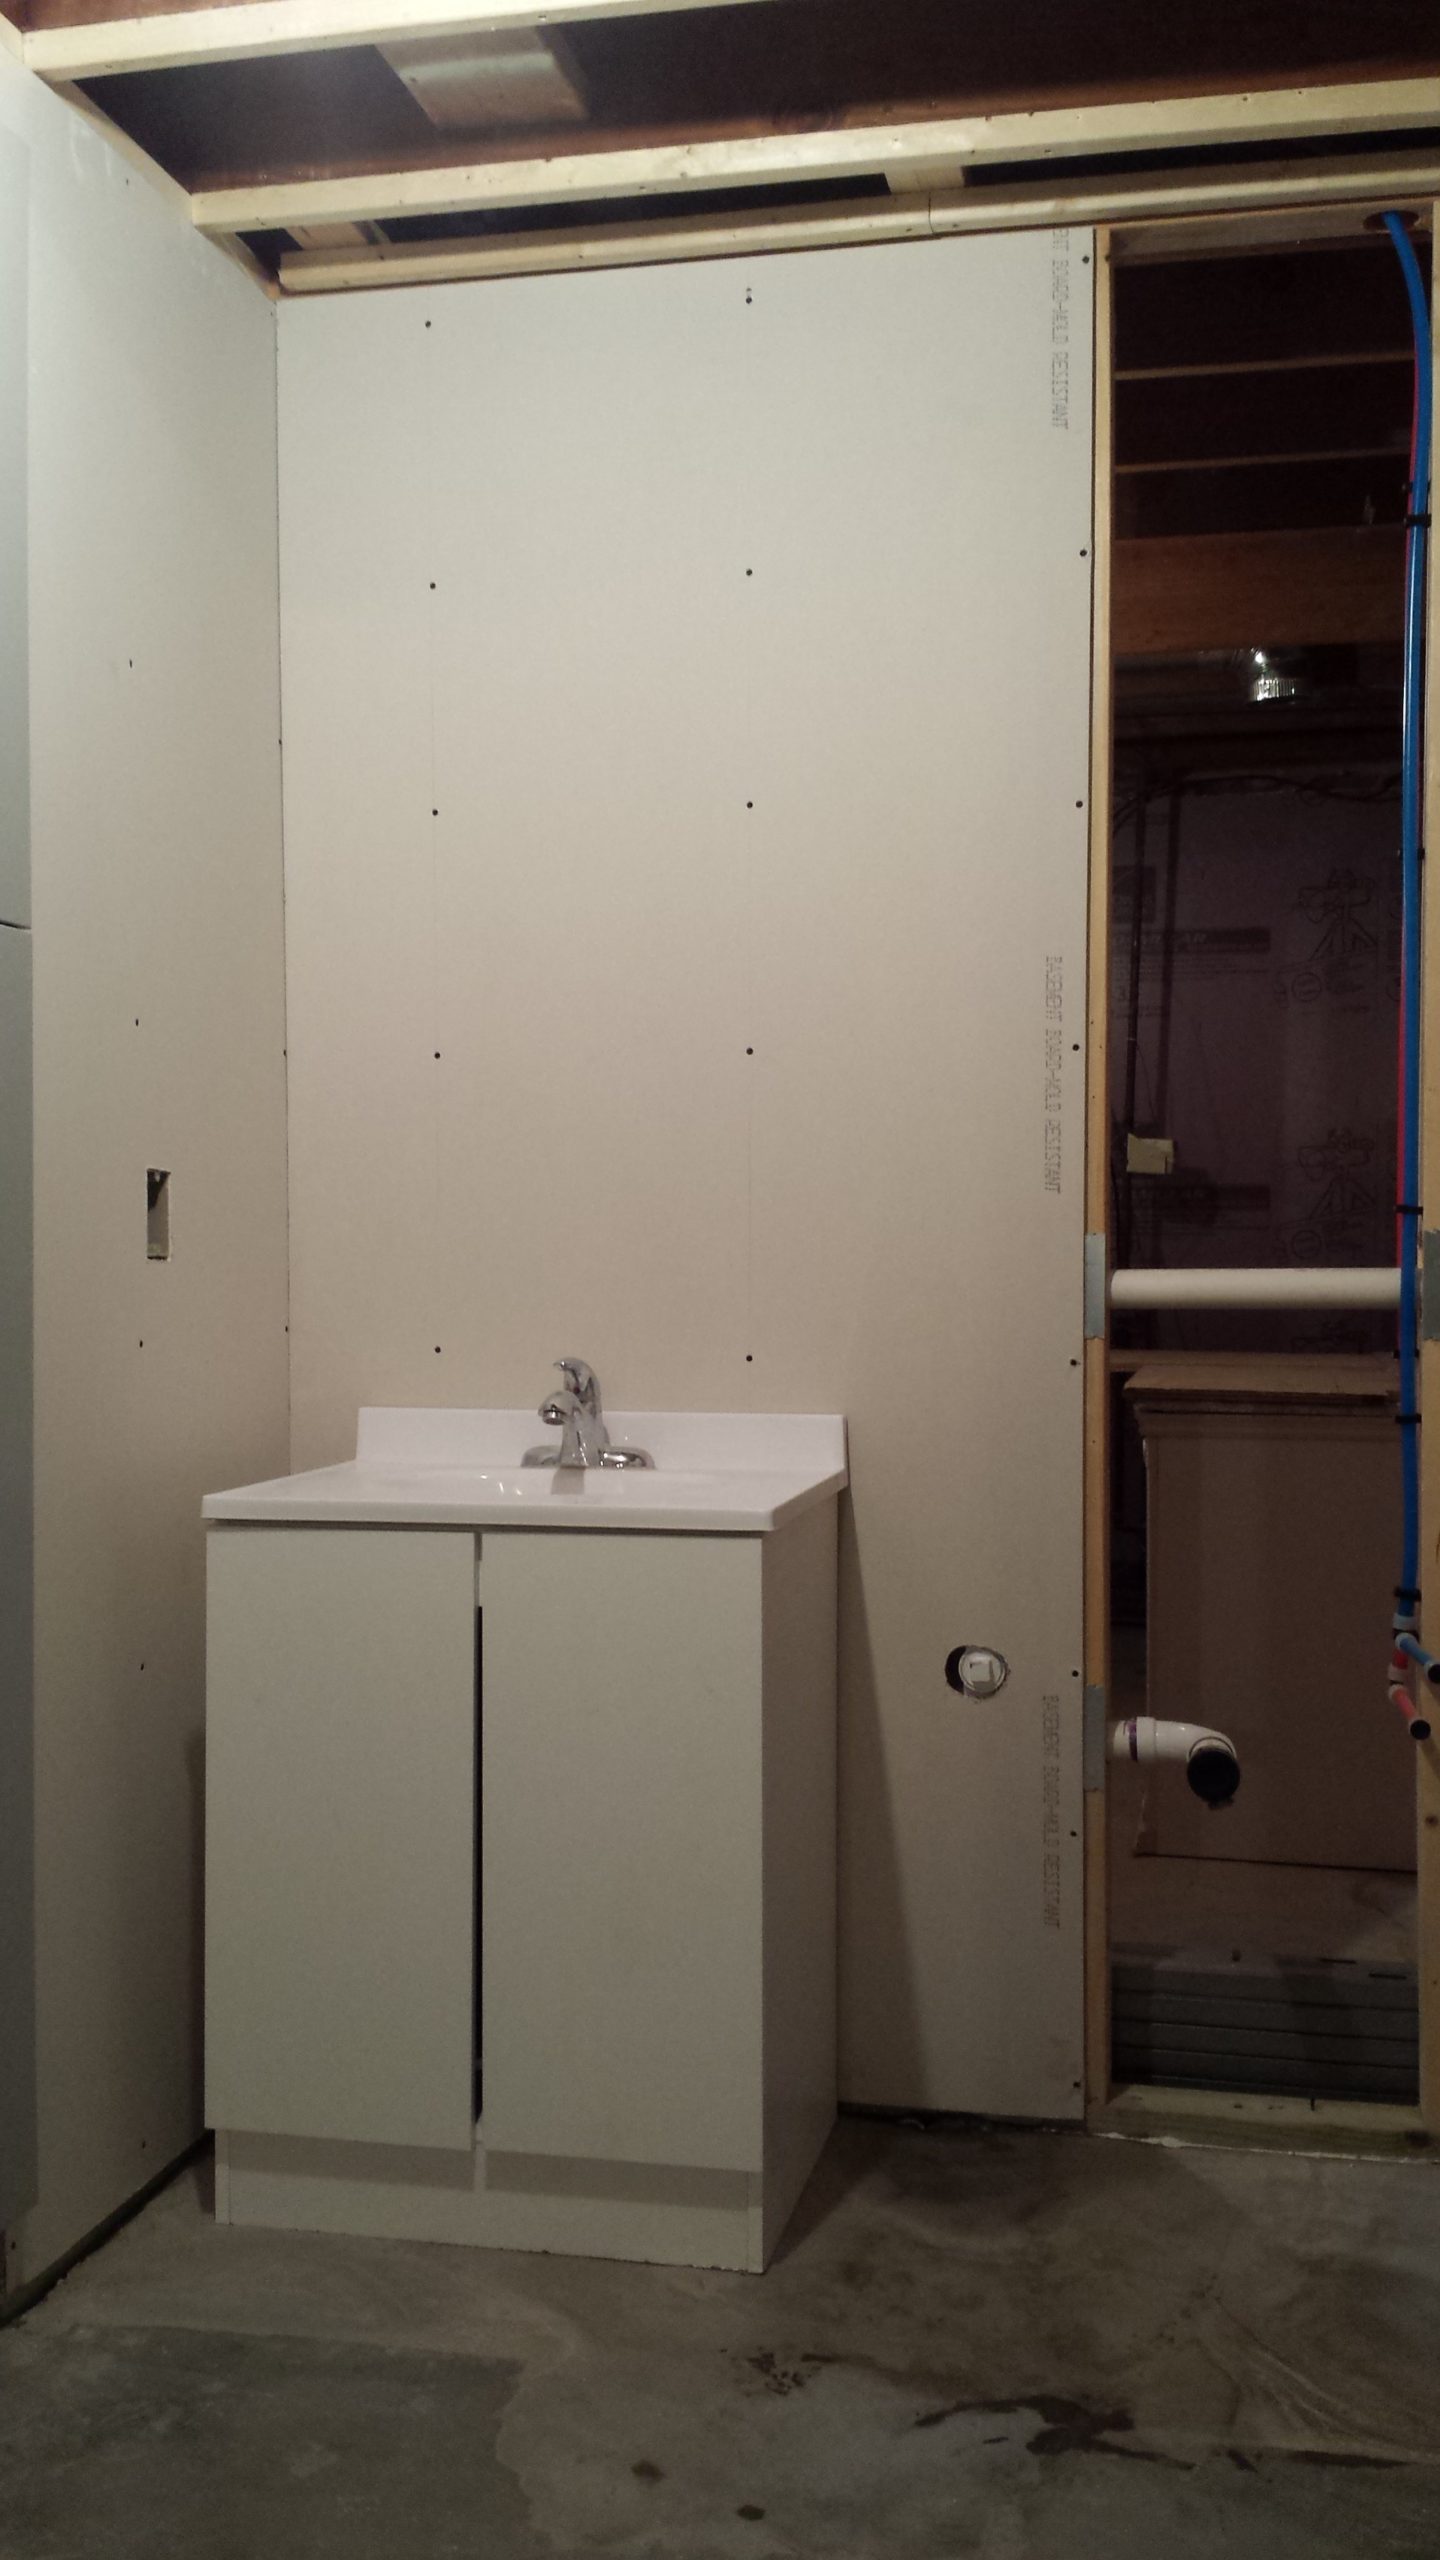
Temporary sink and toilet reinstalled
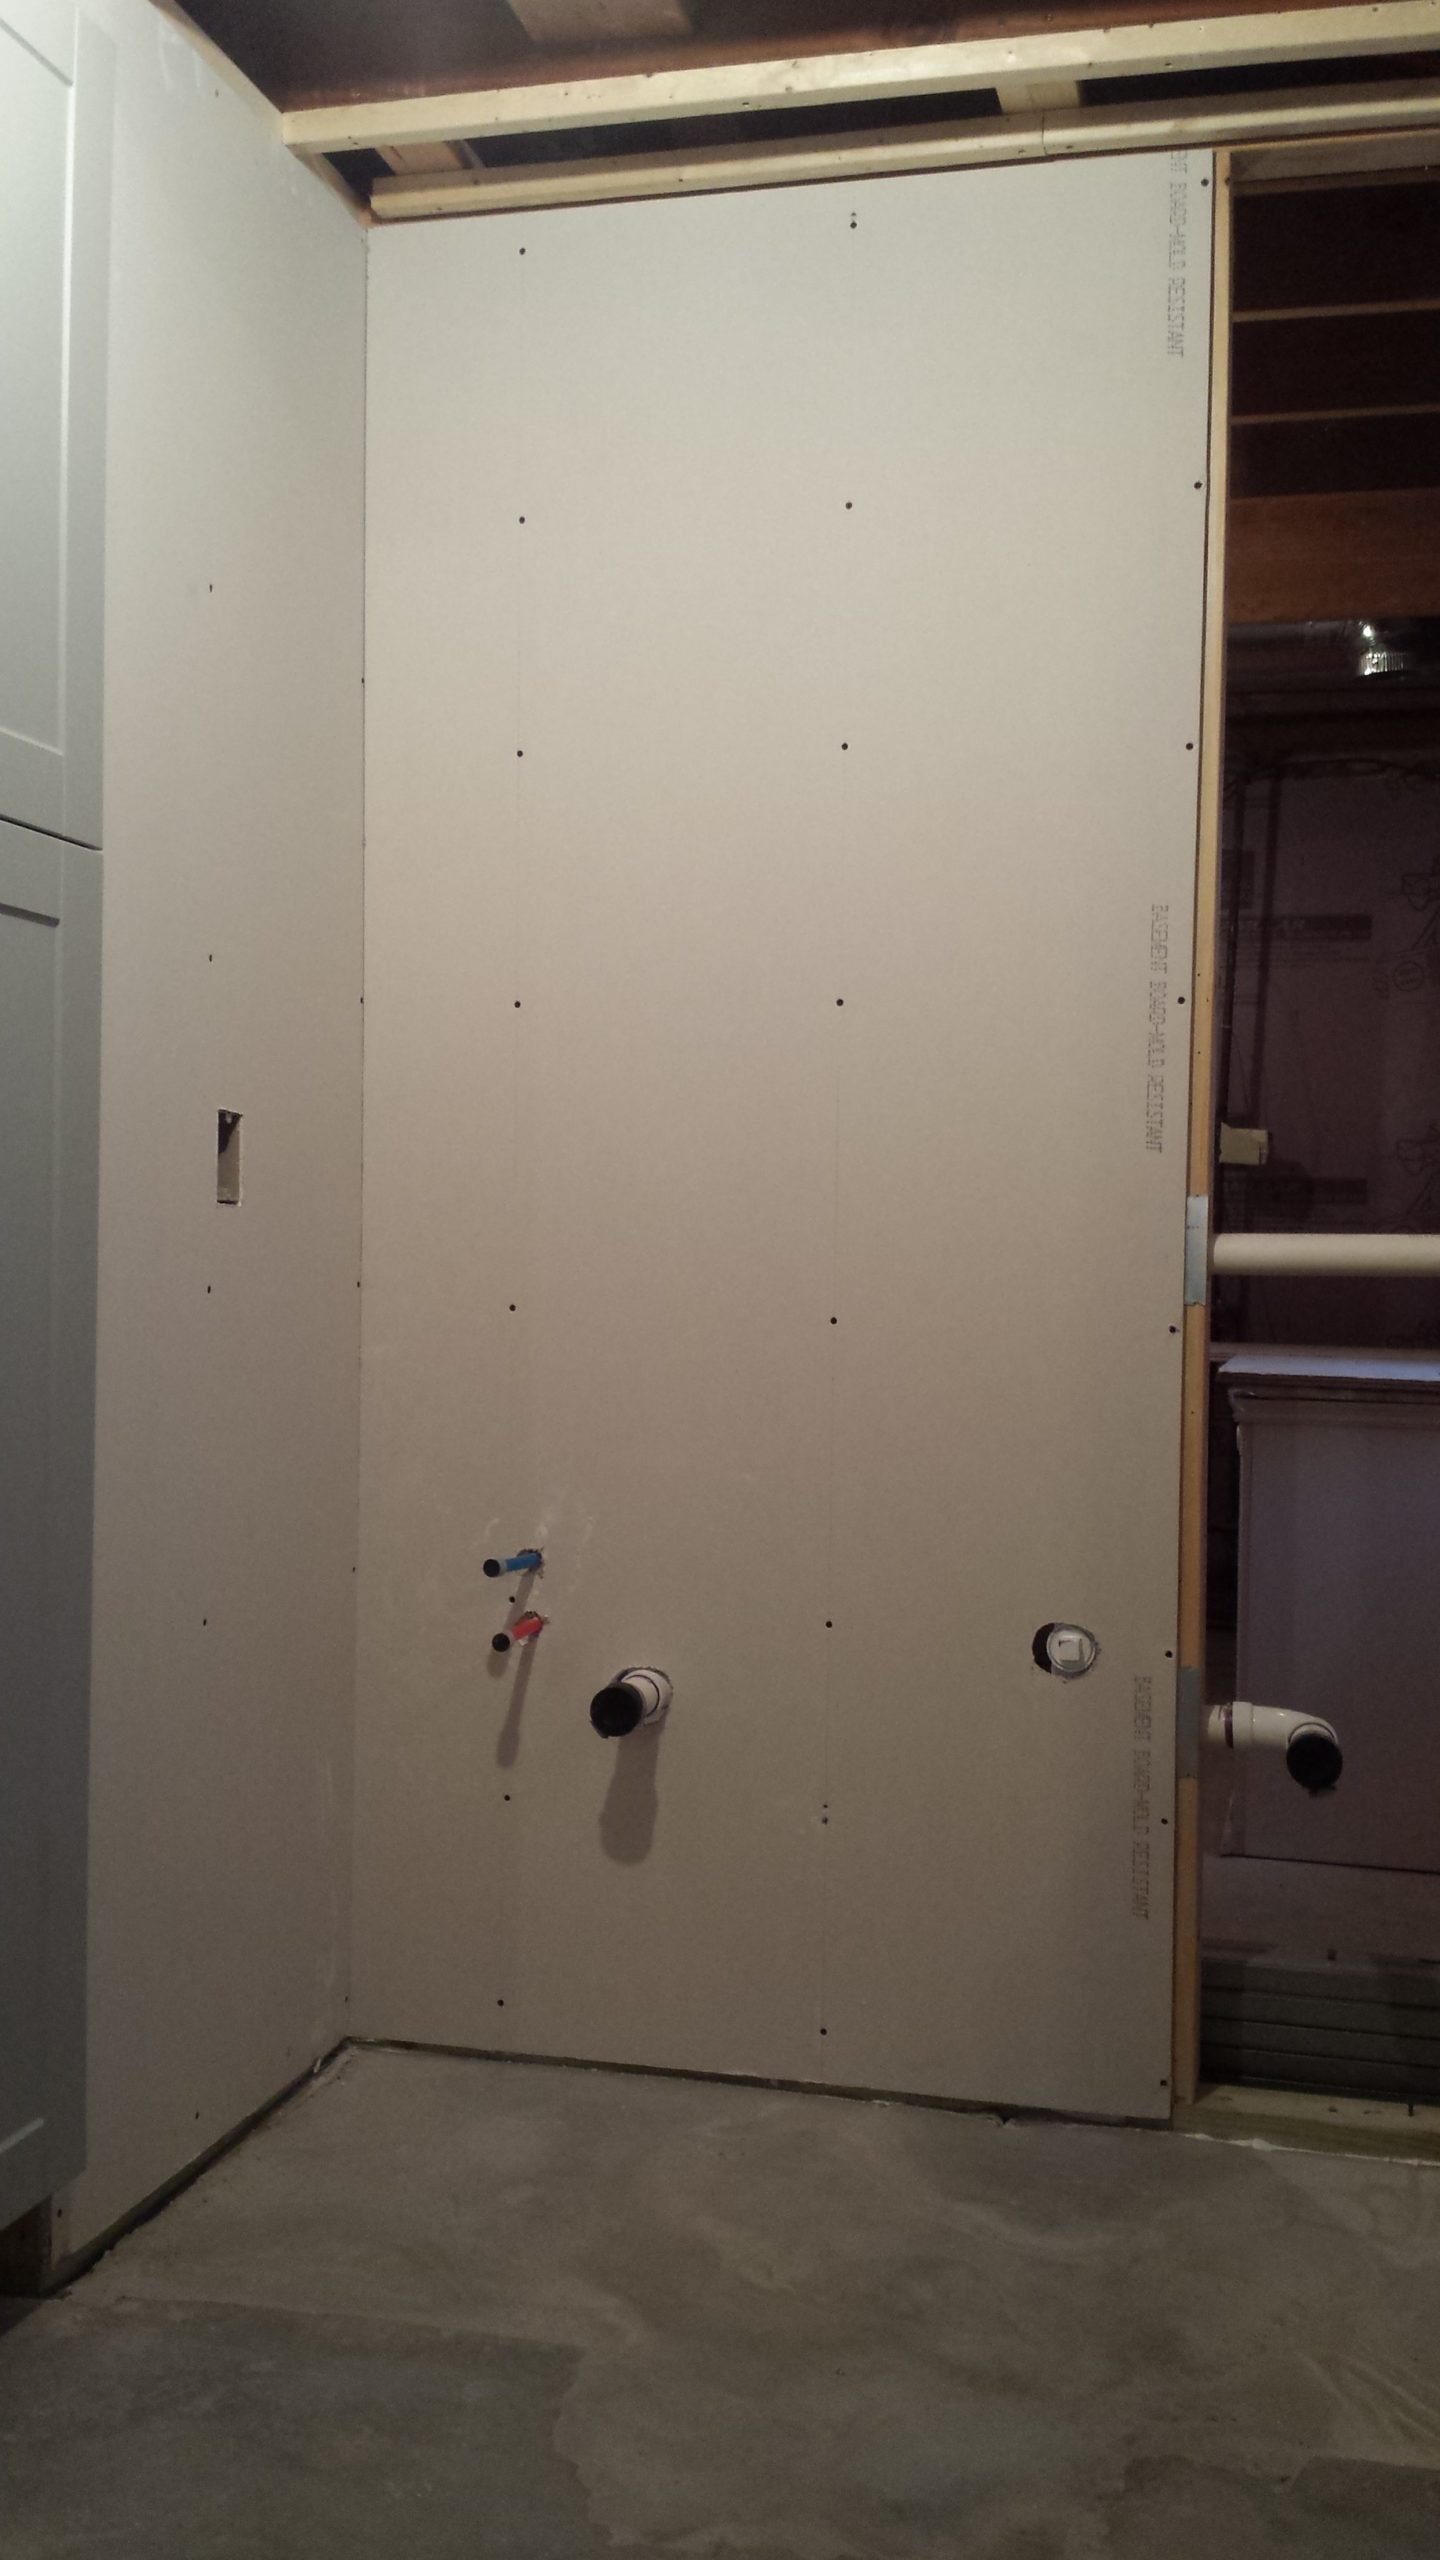
I added some more drywall to the new basement bathroom stud wall, and connected the temporary sink to the new plumbing. I also reinstalled the toilet. There’s still no privacy, however. We still need more drywall and a door.
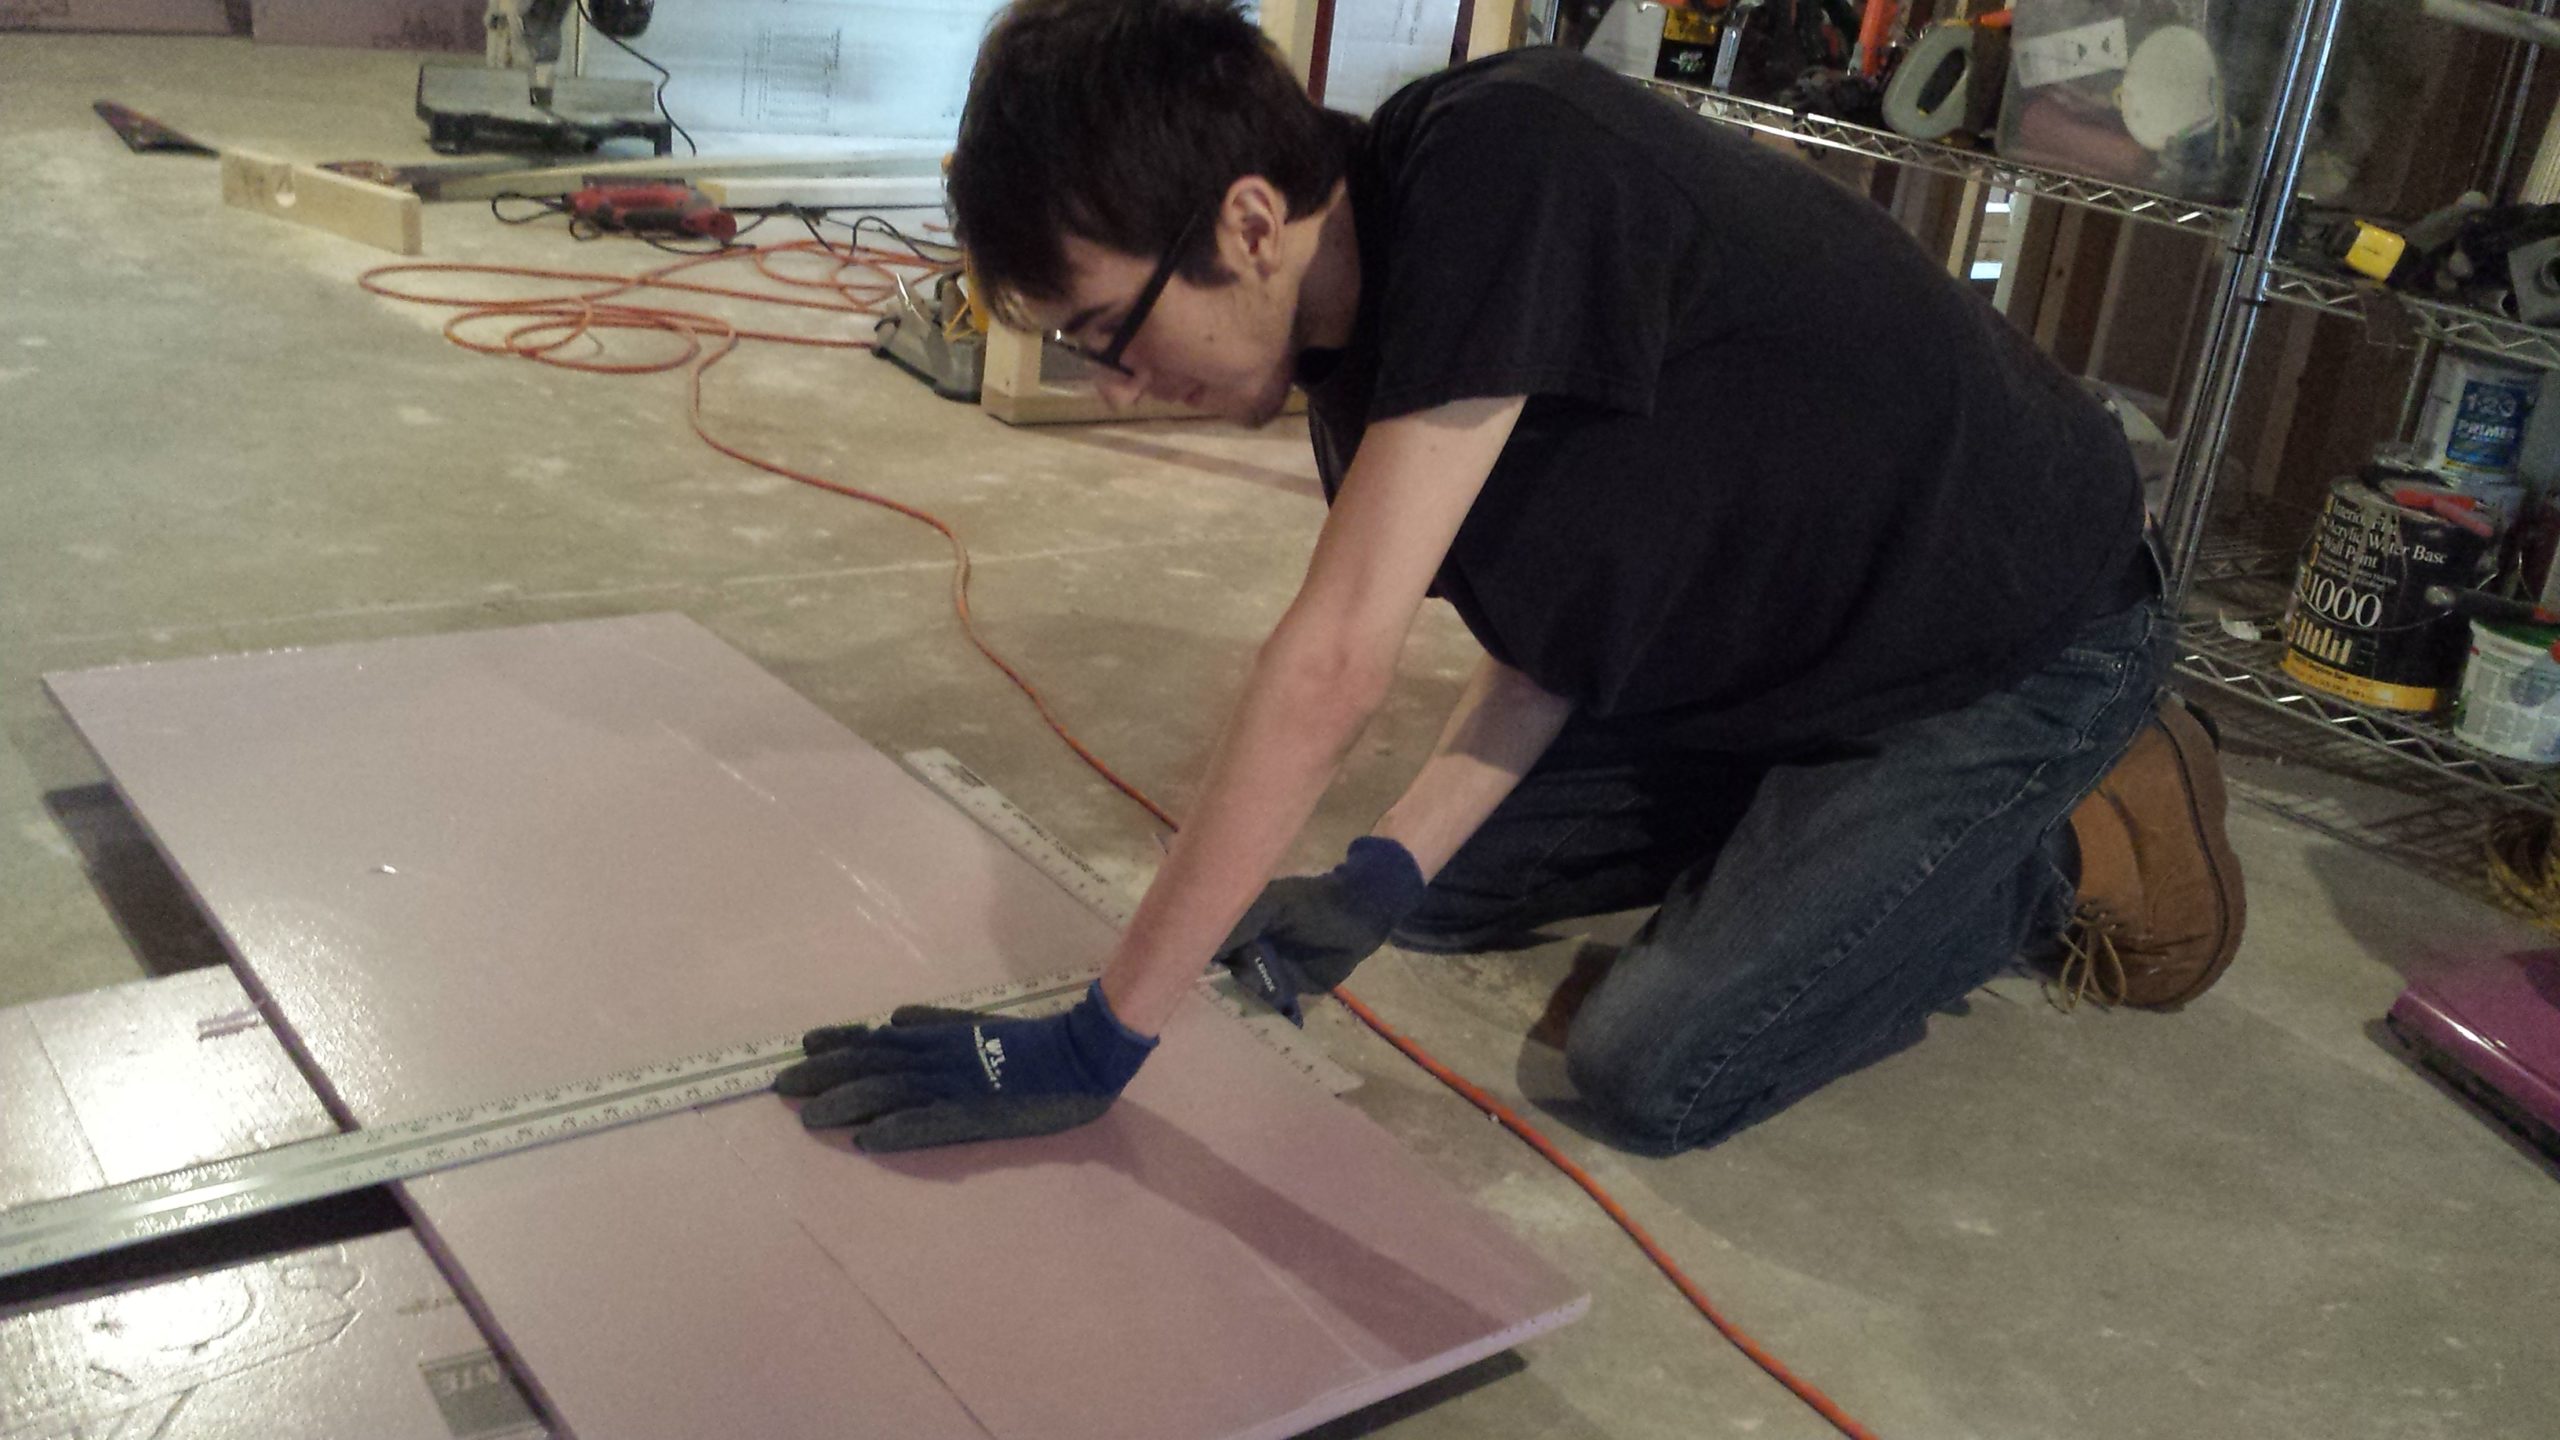
Foamboard insulation work continues
I continue insulating the basement, focusing on the rim joist. This area is hard to see and difficult to insulate between each joist, but is so badly needed. I get some help from Harry who carefully measures and cuts each foamboard piece. Meanwhile, the old screws in the joists are being removed by our foreign exchange student, Pascal.
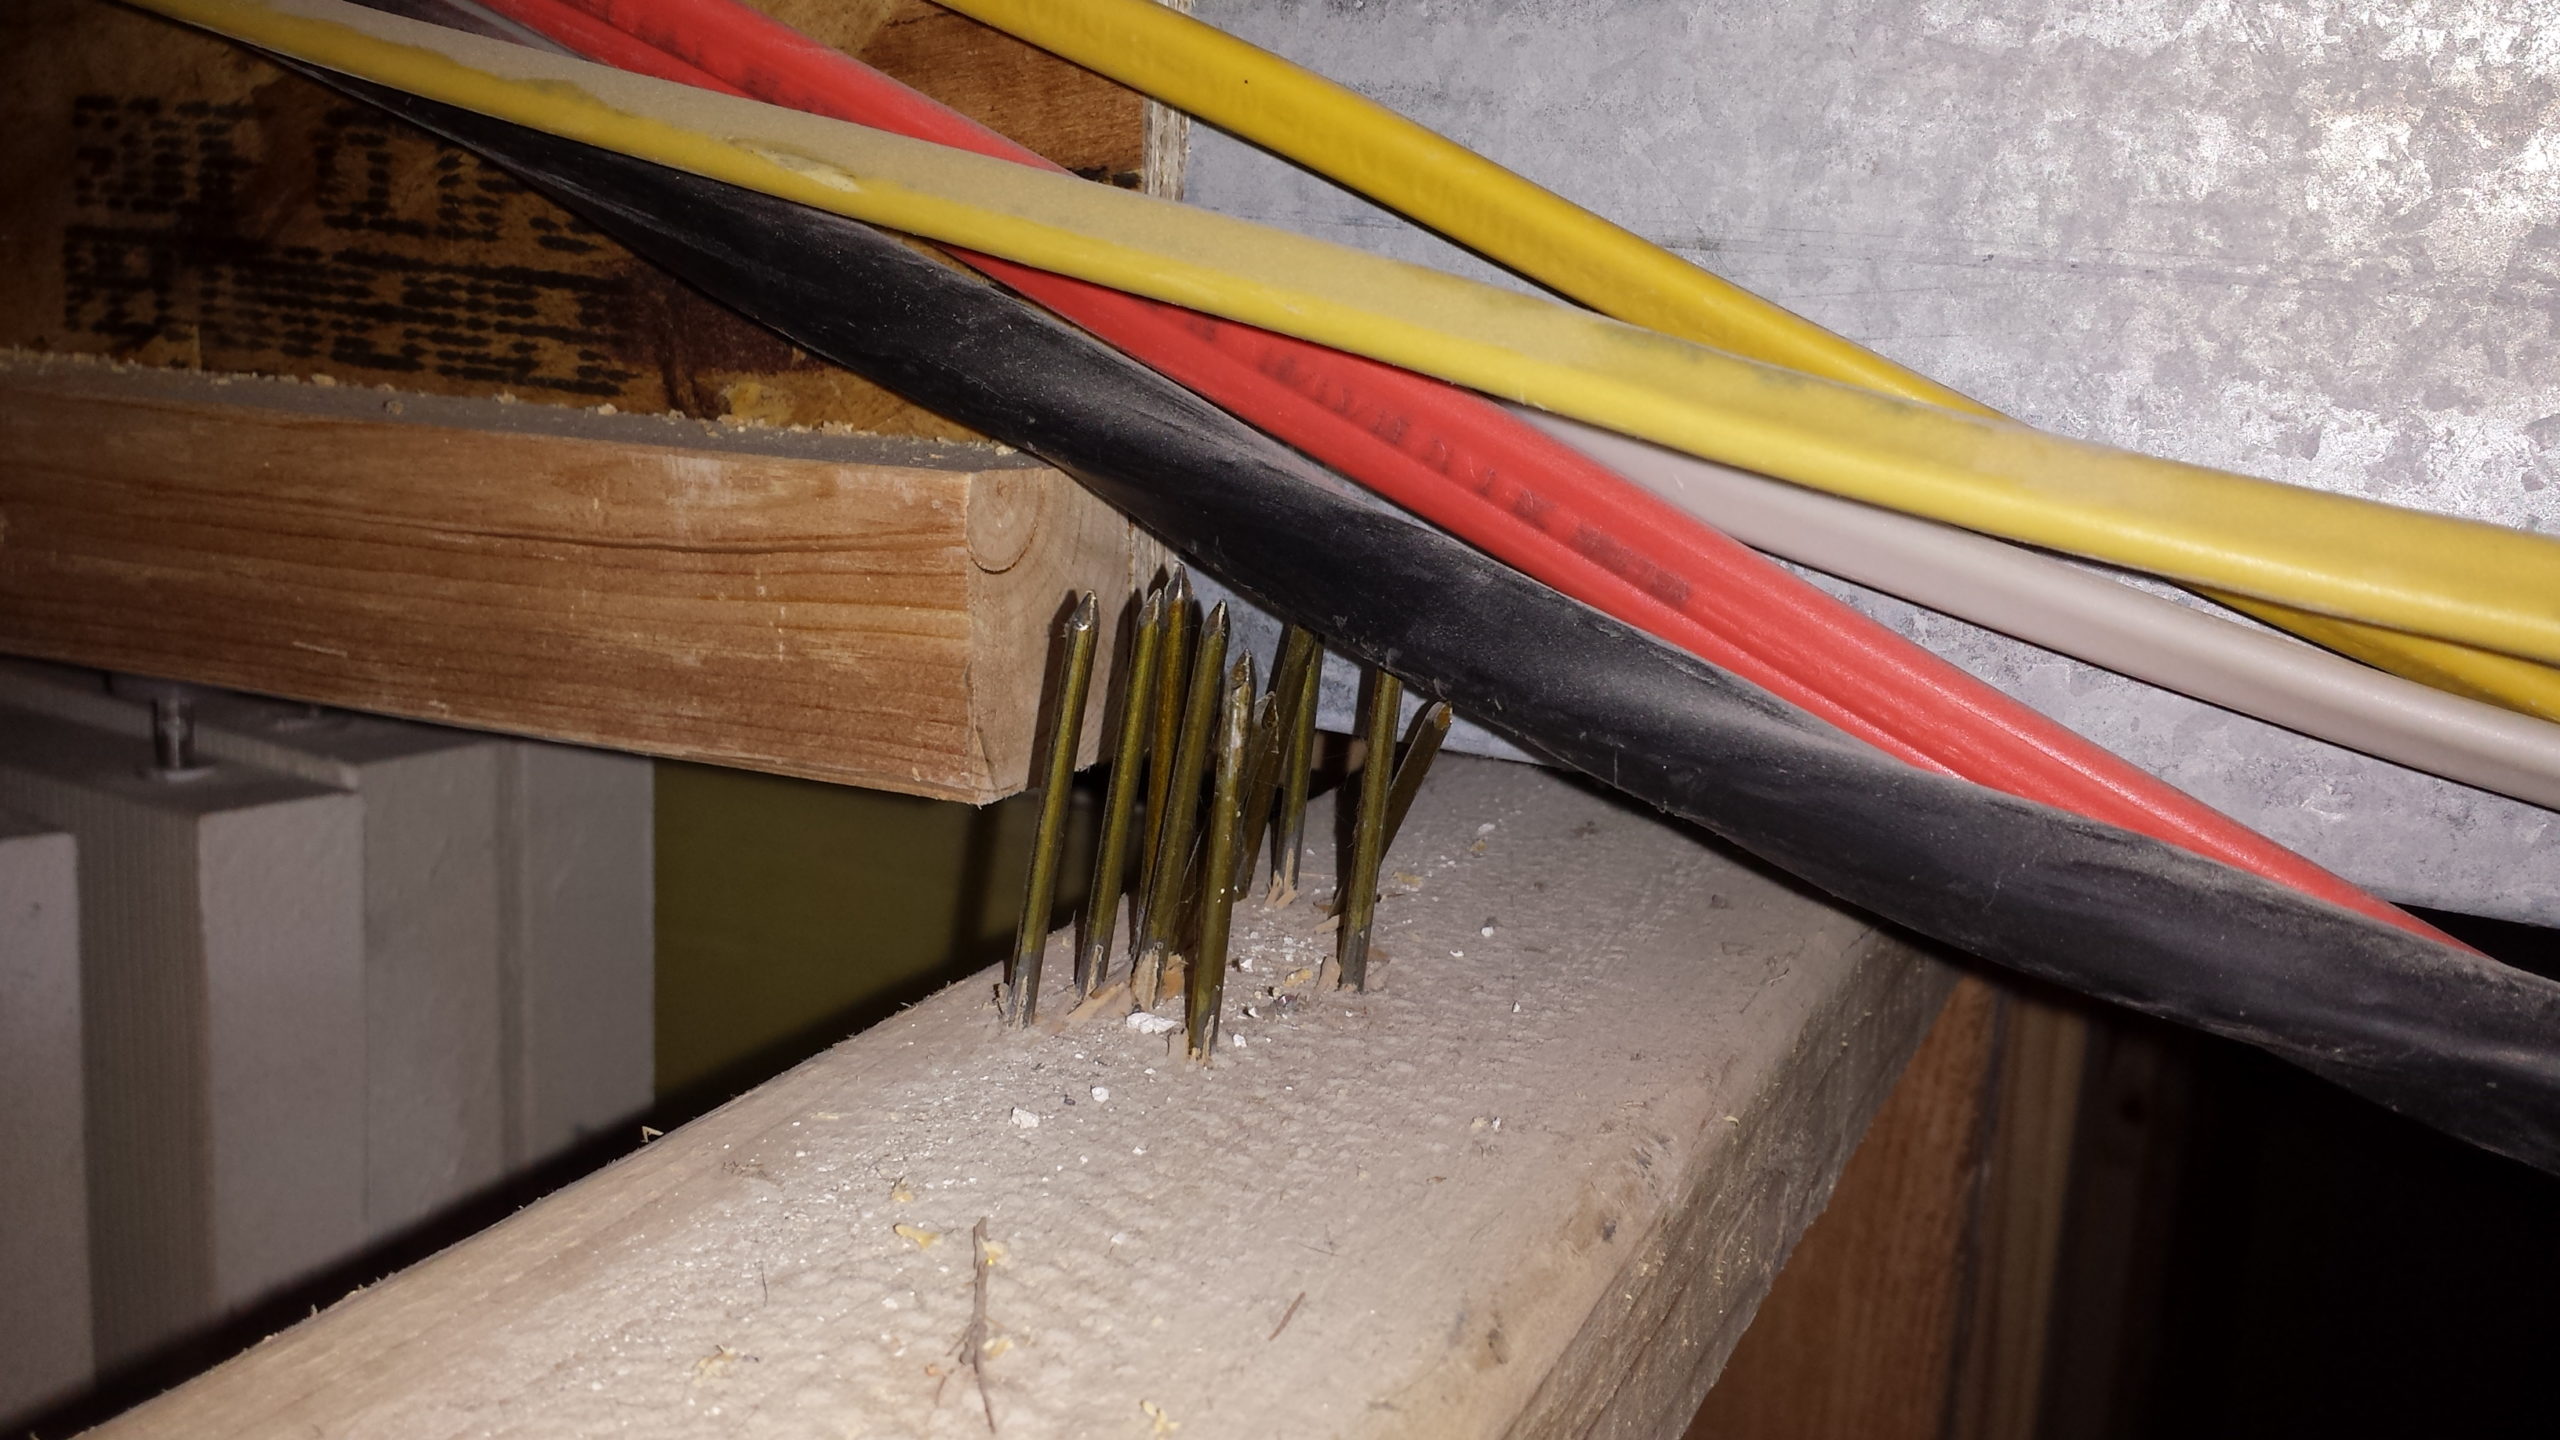
Framing nailer vs wires
Who thinks this is ok? The flipper was trying to connect some overhead soffit framing to the stud wall, but the pieces never had any overlap. Using a pneumatic framing nailer, they just kept on nailing into nothing, even contacting some wires above the ceiling! With the soffit framing worthless, the flipper ended up screwing the drywall directly into the HVAC.
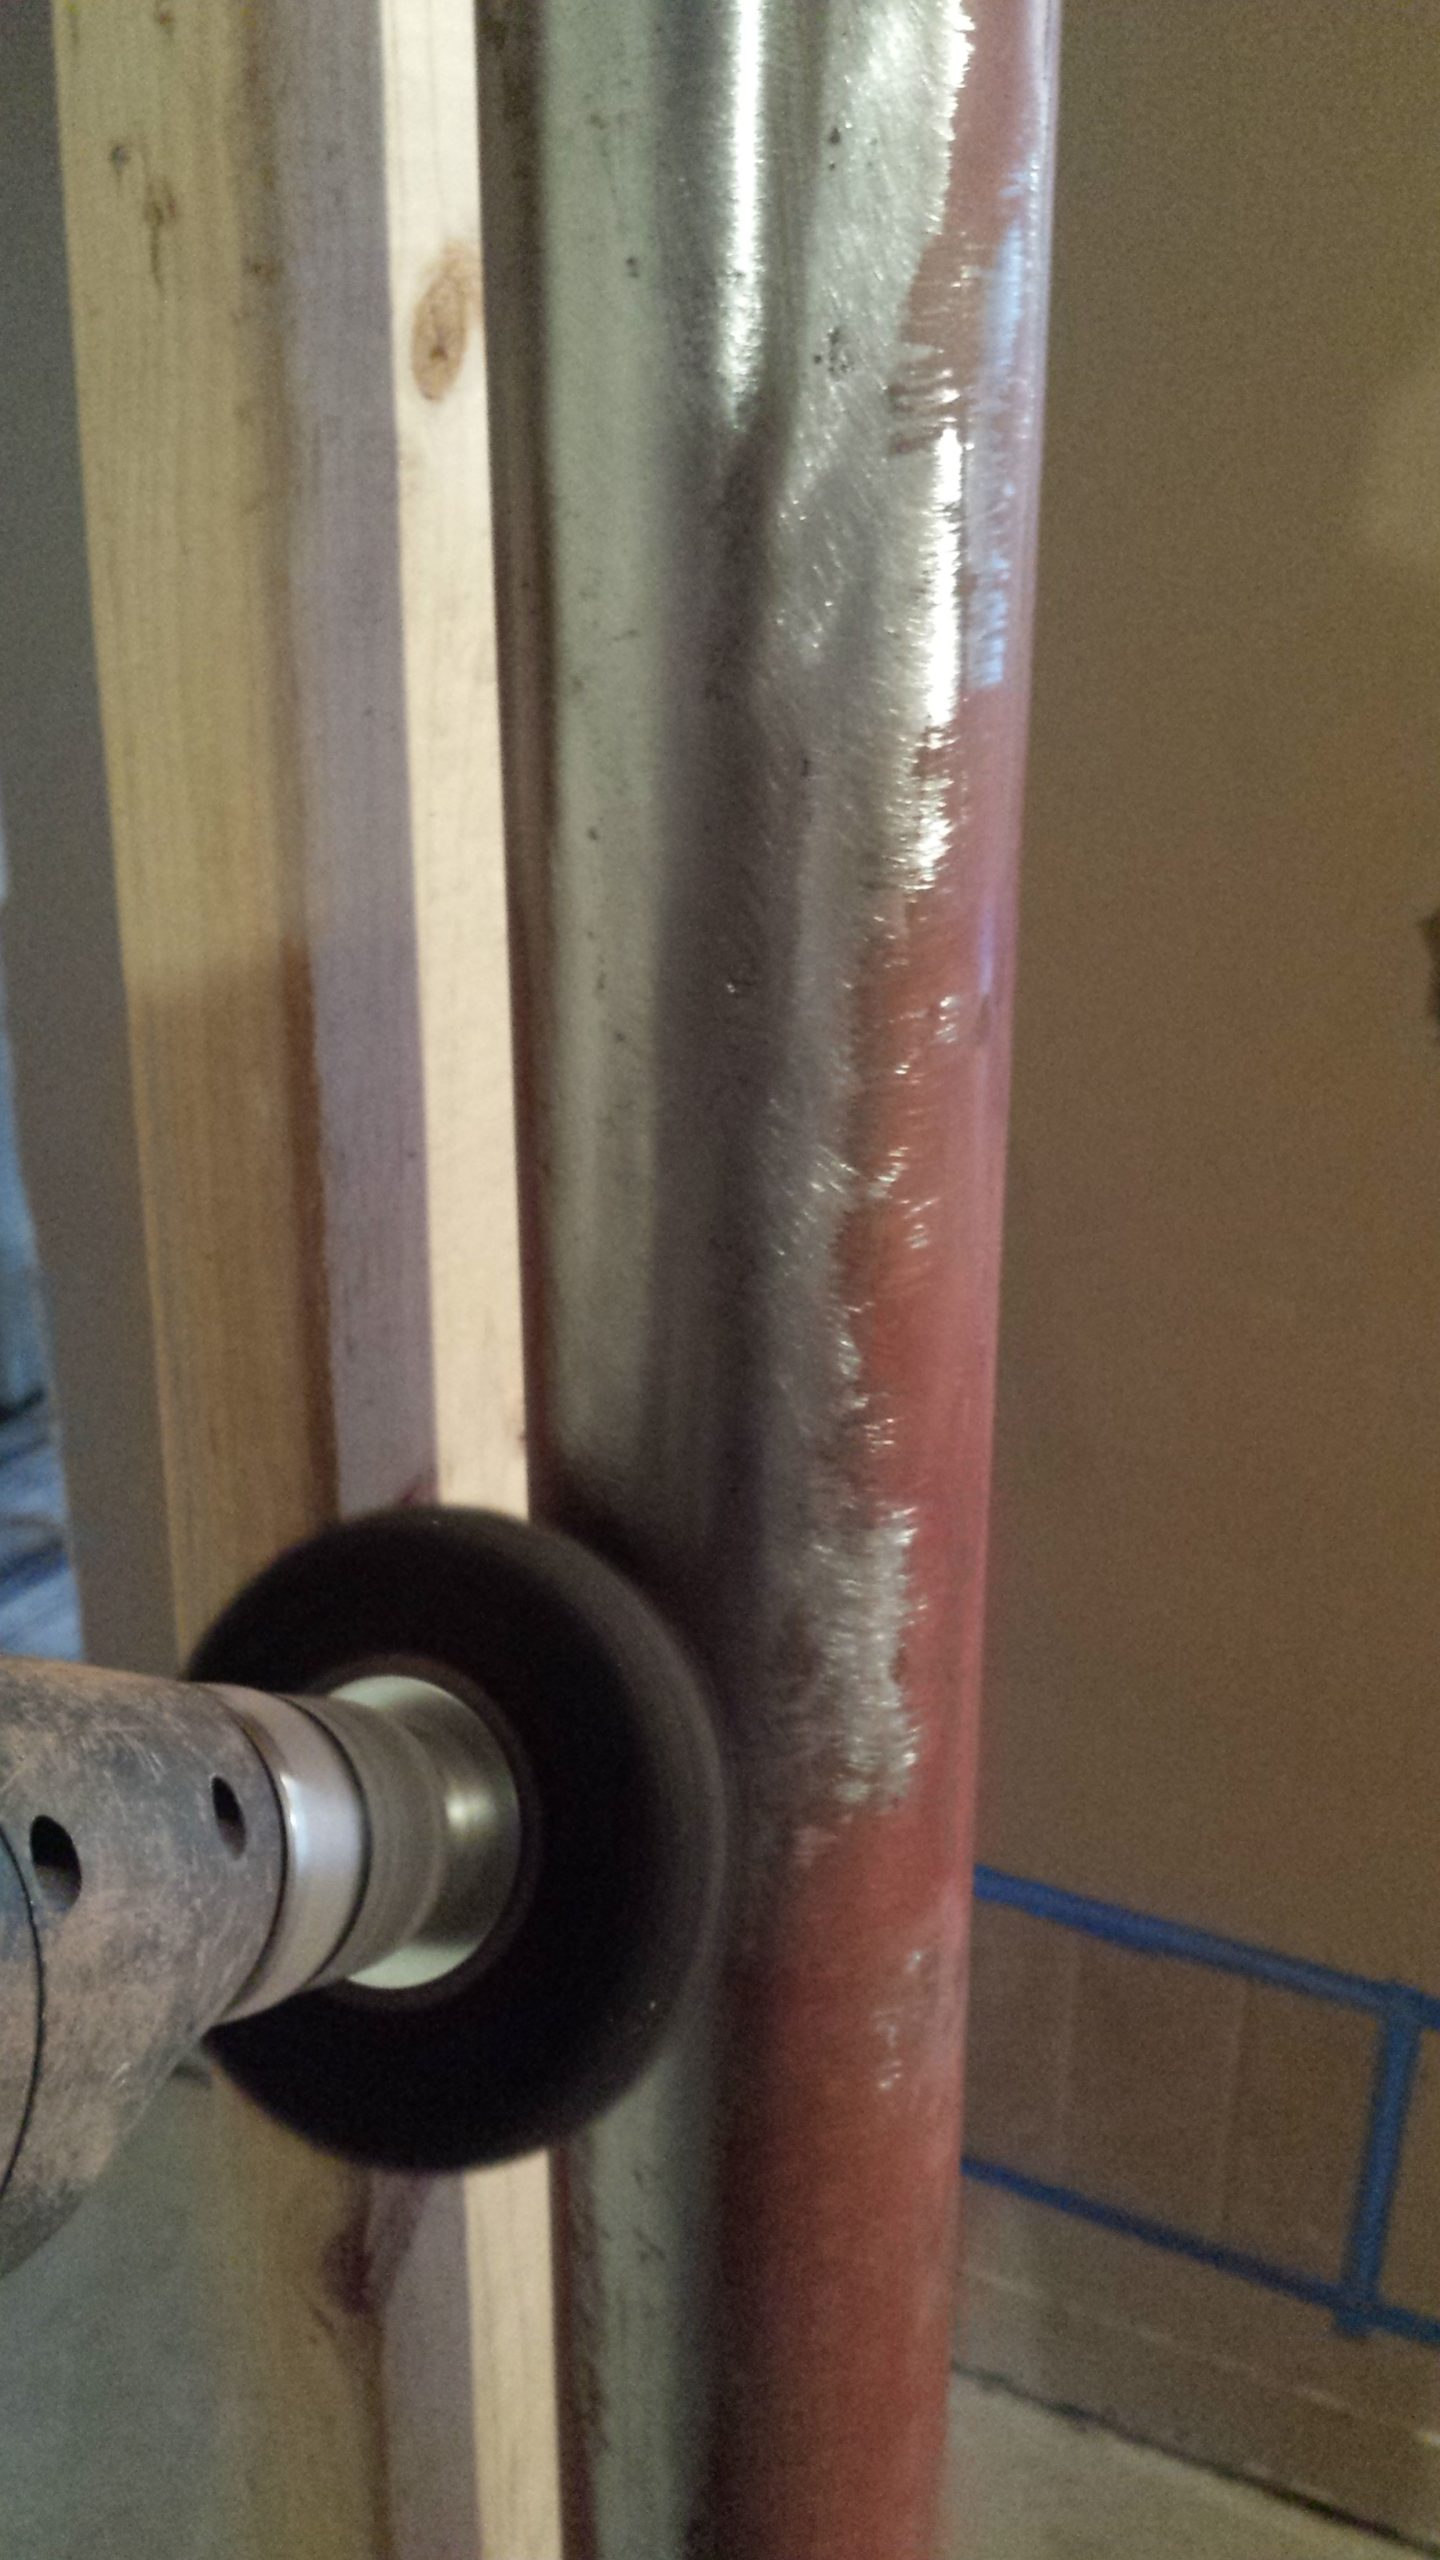
Remember the support column caked with mud?
I have to deal with the rust that has formed on the support column because the flipper caked it with drywall mud. I use a drill brush to remove the rust, then prime and paint the column.